During my Christmas trip to Haute-Savoie, I made some incredible discoveries in our family home—or rather, our family chalet. I shared a glimpse of these treasures in my last Lettre des Alpes, which I wrote to you a few weeks ago. Among my most cherished finds was a cookbook that belonged to my grandmother, Léonce Chenal (yes, her name is the inspiration behind the name of this blog!).
Tucked within the pages of this cookbook were handwritten recipes, some scribbled on scraps of paper or bits of cardboard. These were family recipes from her mother (my great-grandmother Alice), her sister, and even neighbors or friends. Some of the recipes appear to be over a century old, their yellowed and fragile paper bearing the marks of time. As I leafed through these recipes, I came across one for Gâteau des Rois. The timing couldn’t have been more perfect! In France, we traditionally celebrate l’Épiphanie on January 6th (or the first weekend of the month). This Catholic tradition commemorates the arrival of the three wise men after the birth of Christ.
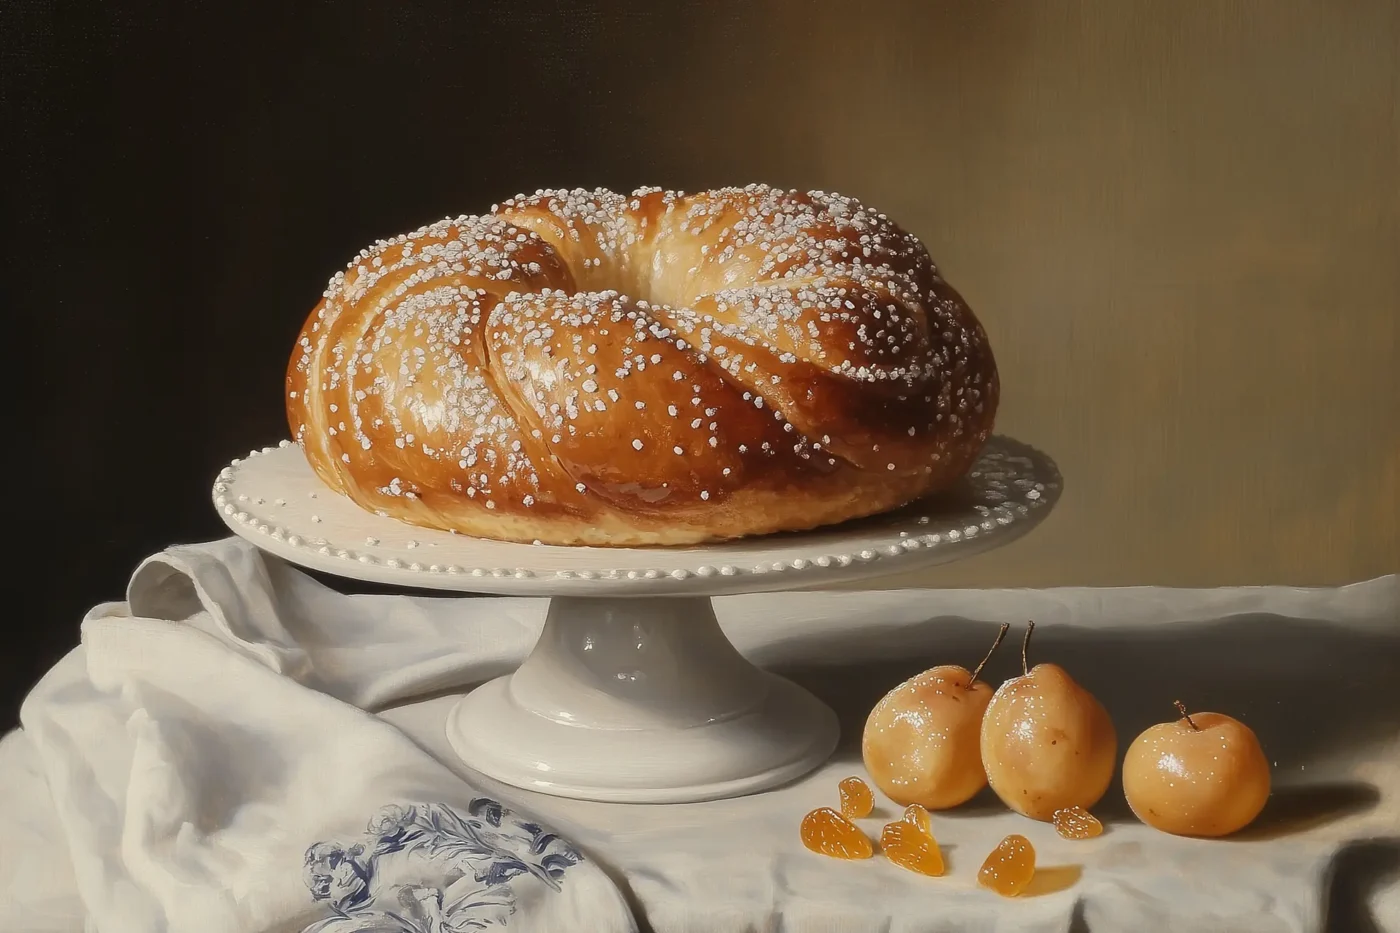
In France, there are two main types of king cakes: the first and most popular is the Galette des Rois, made with flaky puff pastry and filled with almond frangipane, beloved across France, particularly in the north. The second is the Gâteau des Rois, a brioche-style cake flavored with orange blossom water and often decorated with pearl sugar and candied fruits. This version is especially popular in the south of France.
Today, I’m sharing the recipe for the Gâteau des Rois, inspired by my grandmother’s handwritten notes. I tested her recipe twice, tweaking the ingredients, resting times, and baking instructions to achieve the perfect balance. I hope this recipe brings a touch of French tradition to your home and that you enjoy baking (and eating) it as much as I have ;)!
My Grandmother’s Gâteau des Rois Recipe
Ingredients
- 4 cups (500g) all-purpose flour
- 3 large eggs
- ⅔ cup (150g) unsalted butter, softened
- ½ cup (125g) milk
- ¼ cup (50g) granulated sugar
- 2¼ teaspoons (1 packet) active dry yeast or 2 tablespoons (24g) fresh yeast
- 3 tablespoons (50g) orange blossom water
- Zest of 1 orange
- Zest of 1 lemon
For decoration:
- ½ cup (100g) assorted candied fruits
- Pearl sugar
- 1 egg yolk (mixed with a splash of milk) or 2 tablespoons milk for glazing
- 1 a small trinket
Instructions
Activating the Yeast:
- To activate dry yeast, dissolve it in ¼ to ⅓ cup (60–80 ml) of warm milk (95–105°F) with a pinch of sugar to encourage activation.
- Stir gently until the yeast dissolves completely.
- Let the mixture sit for 10–15 minutes in a warm spot, such as near a radiator or in an oven preheated to 120°F and then turned off. When bubbles or foam form on the surface, the yeast is active and ready to use.
Preparing the Dough:
- Dissolve the sugar in warm milk.
- Beat the eggs as if making an omelet.
- In a large bowl or the bowl of a stand mixer fitted with a dough hook, combine the flour, sweetened milk, beaten eggs, orange blossom water, orange zest, lemon zest, and the activated yeast mixture. Mix until the dough begins to come together.
- Gradually add the softened butter, a few pieces at a time, while kneading. Ensure each addition of butter is fully incorporated before adding the next.
- Continue kneading the dough until it becomes smooth, elastic, and slightly sticky. It should stretch easily without tearing. This step may take 10–15 minutes using a stand mixer or 15–20 minutes by hand.
- Cover the dough with a clean, damp kitchen towel or plastic wrap and let it rise in a warm, draft-free spot for 2½ to 3 hours or until it doubles in size.
Tip for Rising:
- My grandmother's method: She would place hot water in a saucepan and set a plate over it. Then, she’d place the dough on the plate and cover it with a clean, dry kitchen towel. The warmth from the water helped the dough rise perfectly.
- My preferred method: Preheat your oven to 120°F, turn it off, and place the covered dough (with a clean, damp kitchen towel) inside to rise. Let it sit until the dough doubles in size, about 2½ to 3 hours.
Degassing the Dough:
- After the dough has risen, sprinkle some flour on your hands to prevent sticking and gently knead the dough to release trapped air.
- At this stage, you can either move on to shaping and baking or refrigerate the dough for at least 2 hours or overnight to allow the flavors to develop further. I recommend the latter option, as it enhances the buttery aroma and reduces the yeast flavor, resulting in a more refined brioche.
Shaping the Crown:
- Once the dough has rested (if refrigerated, bring it to room temperature), place it on a baking sheet lined with parchment paper.
- Shape the dough into a ball and create a hole in the center with your hand to form a crown. Alternatively, you can divide the dough into two smaller portions to make two smaller crowns or use a round bundt pan to help the brioche maintain a taller, more defined shape.
- Let the shaped dough rise for an additional 1½ hours in a warm spot until it doubles in size.
Decorating and Baking:
- Preheat your oven to 340°F (170°C).
- Insert a small trinket (like a fève) into the dough, if desired.
- Brush the surface with beaten egg or milk for a golden finish.
- Decorate with pearl sugar and candied fruits, pressing them lightly into the dough to ensure they stick.
- Place the brioche in the oven and bake for 30 to 35 minutes. After 15 to 20 minutes, loosely cover the brioche with aluminum foil to prevent excessive browning while allowing the inside to cook through evenly. The brioche is ready when a knife inserted into the center comes out clean.Remove from the oven and allow it to cool slightly before serving. Enjoy warm or at room temperature.

